Almalinux9にてZabbix7.0LTSのインストール方法について解説します。
最後に補足としてパッケージの説明も記載しています。
導入環境&事前導入手順
導入環境
・AlmaLinux 9.4
・firewall無効化
導入手順
導入手順は公式サイトの手順に則って実施して行きます。
公式サイトの手順にMySQL とhttpdのインストール手順が記載なく
入っている前提で手順が進みますので、まずはこの2つをインストールしていきます。
MySQLとhttpdのインストール
dnf install mysql-server httpdMySQLを起動し自動起動設定を有効にします
systemctl start mysqld
systemctl enable mysqld httpd
firewallを無効にします
systemctl stop firewalldfirewallの自動起動を無効化します
systemctl disable firewalldMySQLの初期設定
mysql_secure_installation以下のようにinstallationが起動するのでyとn(y以外のキー)を入力し初期設定を進めていく
[root@zabbix-test ~]# mysql_secure_installation
Securing the MySQL server deployment.
Connecting to MySQL using a blank password.
VALIDATE PASSWORD COMPONENT can be used to test passwords
and improve security. It checks the strength of password
and allows the users to set only those passwords which are
secure enough. Would you like to setup VALIDATE PASSWORD component?
Press y|Y for Yes, any other key for No: n
Please set the password for root here.
New password: パスワードの設定
Re-enter new password: 再度パスワード入力
By default, a MySQL installation has an anonymous user,
allowing anyone to log into MySQL without having to have
a user account created for them. This is intended only for
testing, and to make the installation go a bit smoother.
You should remove them before moving into a production
environment.

Remove anonymous users? (Press y|Y for Yes, any other key for No) : y
Success.
Normally, root should only be allowed to connect from
'localhost'. This ensures that someone cannot guess at
the root password from the network.

Disallow root login remotely? (Press y|Y for Yes, any other key for No) : y
Success.
By default, MySQL comes with a database named 'test' that
anyone can access. This is also intended only for testing,
and should be removed before moving into a production
environment.

Remove test database and access to it? (Press y|Y for Yes, any other key for No) : y
 - Dropping test database...
Success.
 - Removing privileges on test database...
Success.
Reloading the privilege tables will ensure that all changes
made so far will take effect immediately.

Reload privilege tables now? (Press y|Y for Yes, any other key for No) : y
Success.
All done!
[root@zabbix-test ~]#
Zabbix Serverの導入手順
Mysqlとhttpdのインストールが完了したのでzabbixのインストールします
リポジトリの登録
rpm -Uvh https://repo.zabbix.com/zabbix/7.0/alma/9/x86_64/zabbix-release-7.0-5.el9.noarch.rpmキャッシュのクリア
dnf clean allインストールコマンドの実施
dnf install zabbix-server-mysql zabbix-web-mysql zabbix-apache-conf zabbix-sql-scripts zabbix-selinux-policy zabbix-agent zabbix-web-japaneseDBに接続
mysql -uroot -p先ほどmysql_secure_installationで作成したパスワードを入力し以下のコマンドを
実施しDB、ユーザー作成、権限付与をします
※赤文字は作成するzabbixユーザーのパスワードです
CREATE DATABASE zabbix CHARACTER SET utf8mb4 COLLATE utf8mb4_bin;
CREATE USER zabbix@localhost IDENTIFIED BY 'zabbix';
GRANT all privileges ON zabbix.* TO zabbix@localhost;
SET global log_bin_trust_function_creators = 1;
quit;
DBへ初期データをインポート
パスワードを求められるので先ほど作成したzabbixユーザーのパスワードを入力します
zcat /usr/share/zabbix-sql-scripts/mysql/server.sql.gz | mysql --default-character-set=utf8mb4 -uzabbix -p zabbixMySQLにログインしlog_bin_trust_function_creatorsを無効化します
mysql -uroot -p
set global log_bin_trust_function_creators = 0;
quit;
zabbix_server.confのパタメーターを変更します
vi /etc/zabbix/zabbix_server.confDBPasswordにパスワードを設定します
DBPassword=zabbixサービスを起動し自動起動設定をします
systemctl restart zabbix-server zabbix-agent httpd php-fpm
systemctl enable zabbix-server zabbix-agent httpd php-fpm
サービス起動後にWEBブラウザから以下のURLでアクセスします
http://zabbixサーバのアドレス/zabbixアクセスが成功すると以下のような画面になります。
アクセスが成功したらDefault Languageを日本語に変更します。
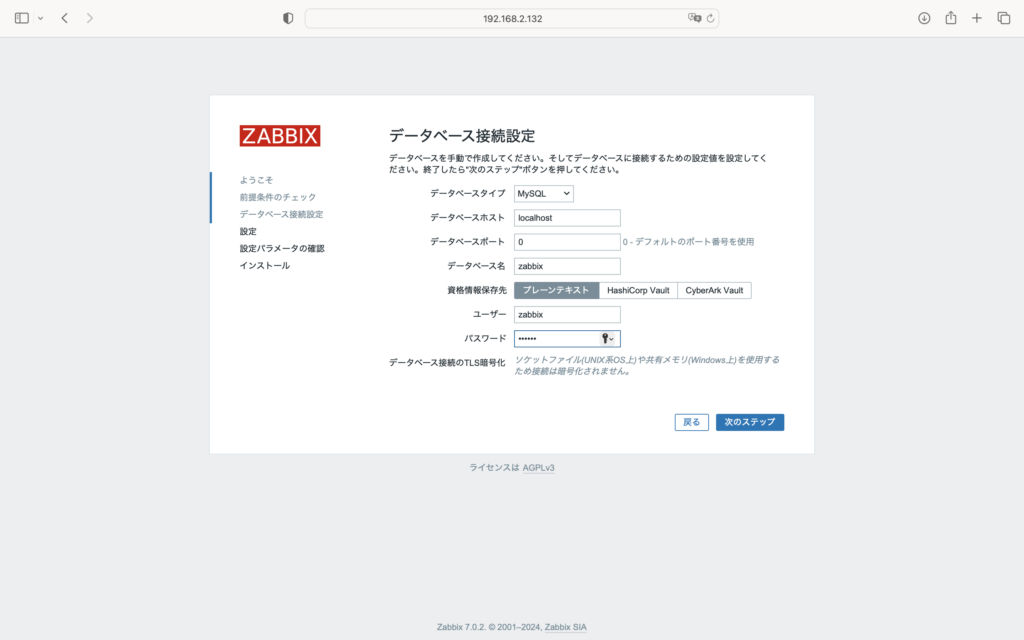
次のステップをクリックし初期設定を進めていくとデータベース接続の設定画面になりますので、zabbixユーザーのパスワードを入力し次のステップへを選択し先に進みます。
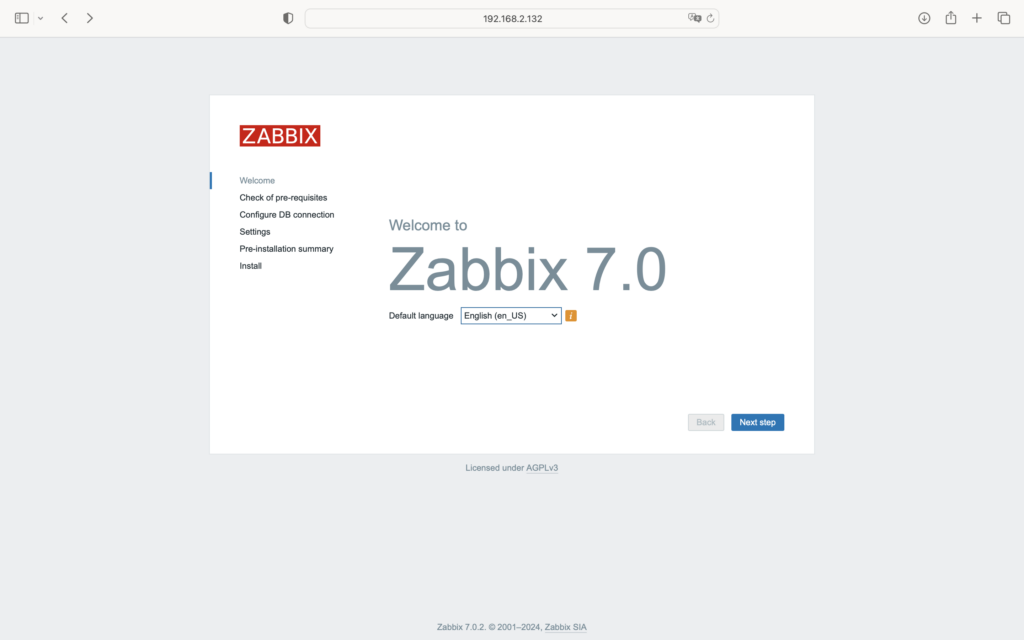
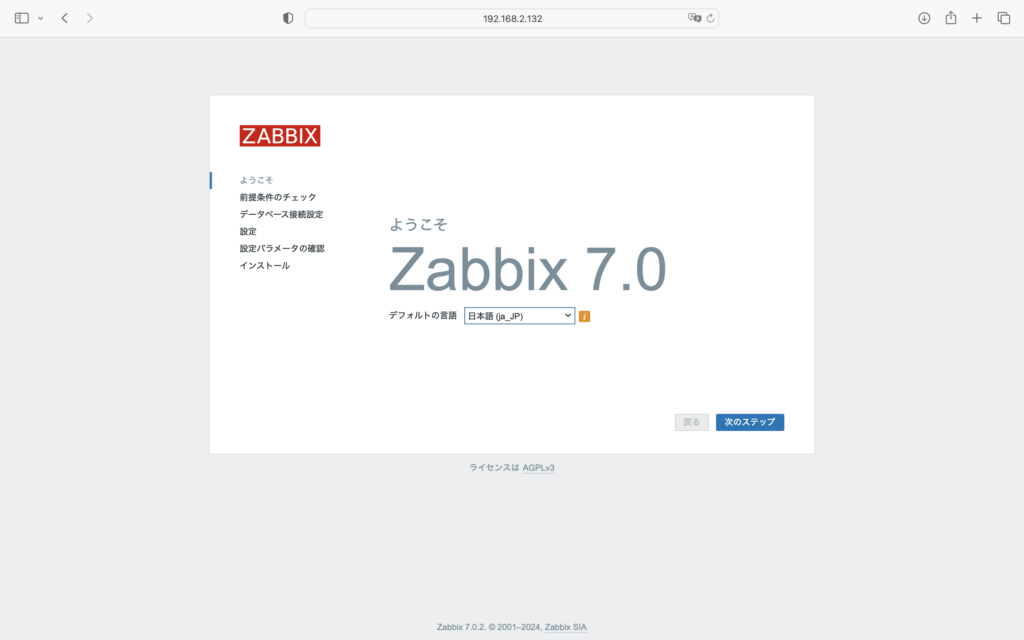
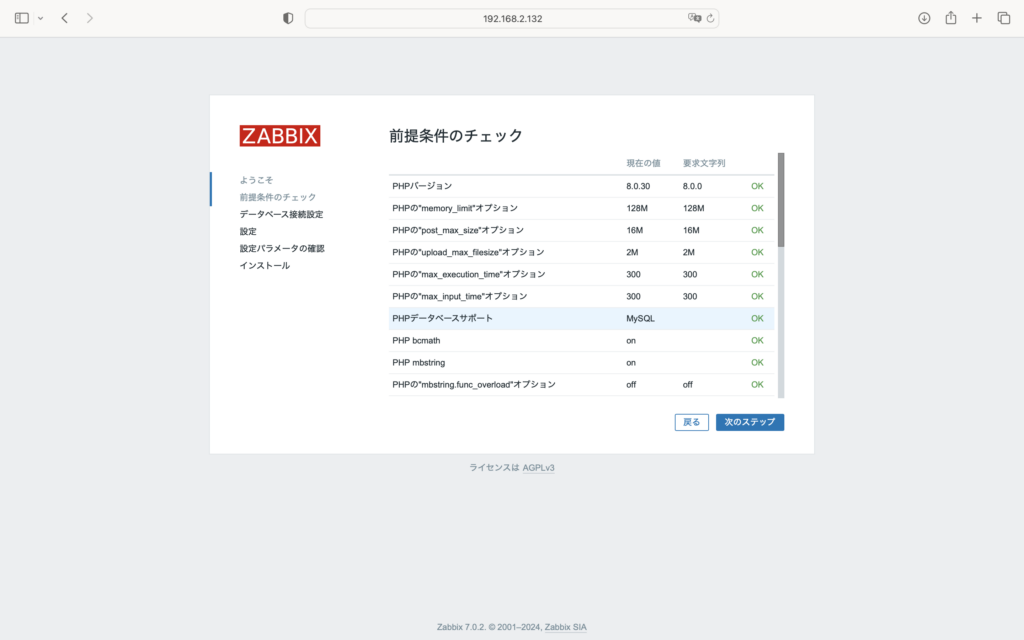
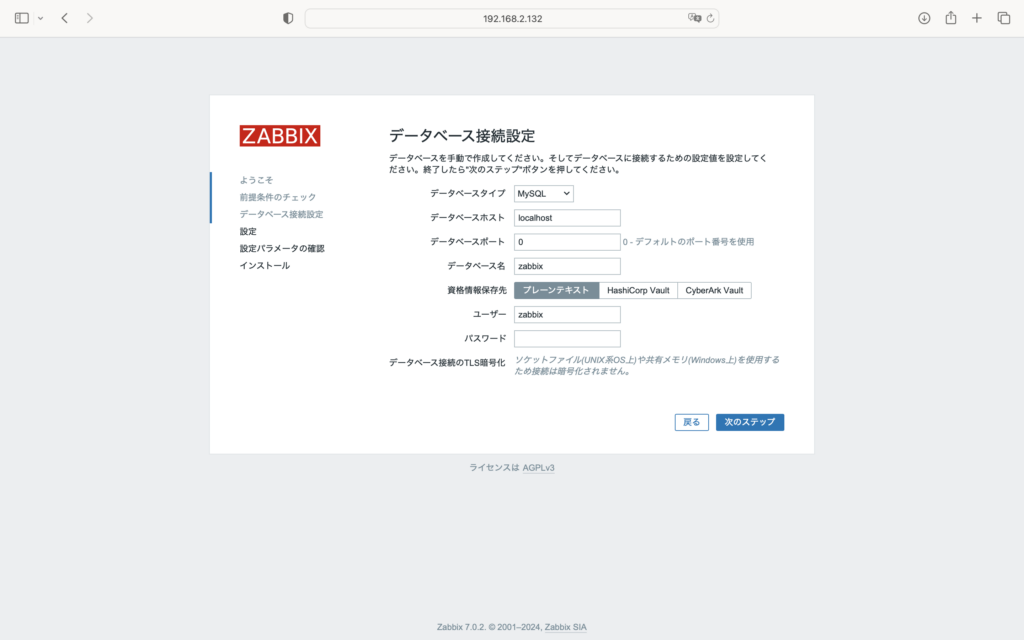
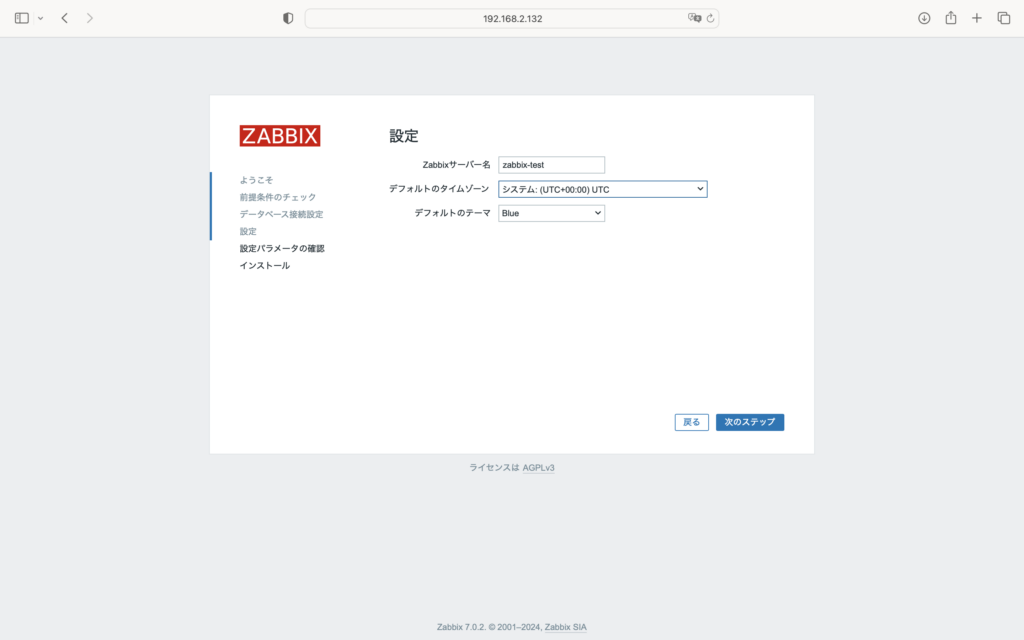
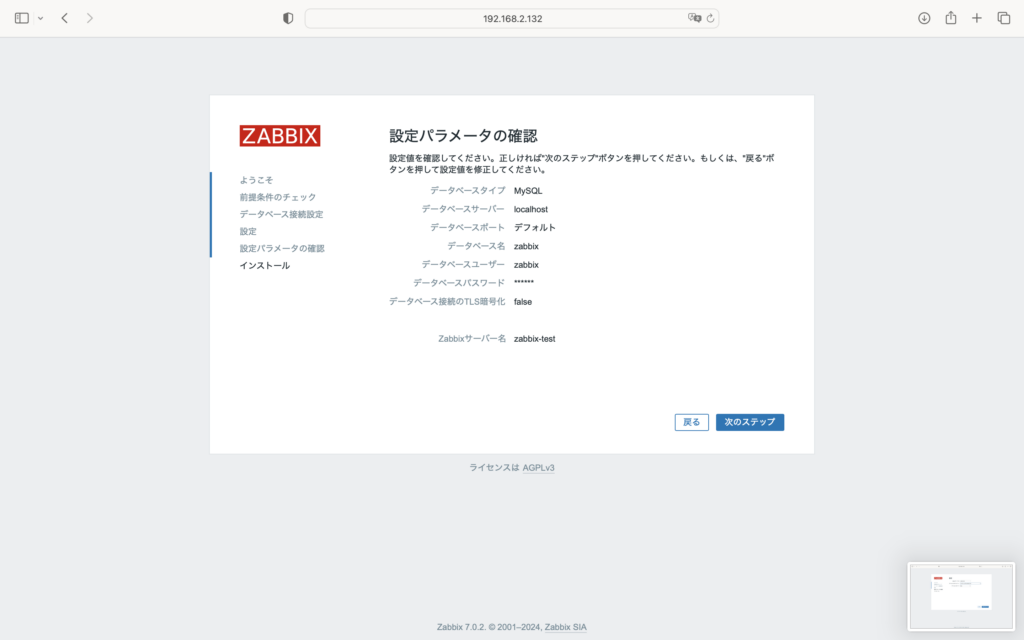
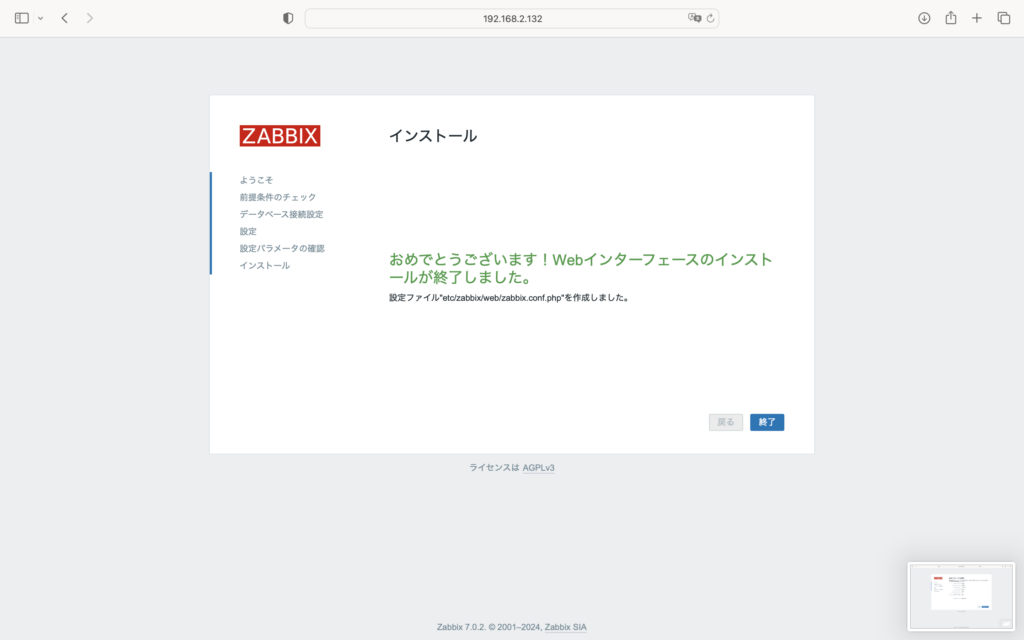
以下のような画面になったら初期設定完了です。
終了を選択します。
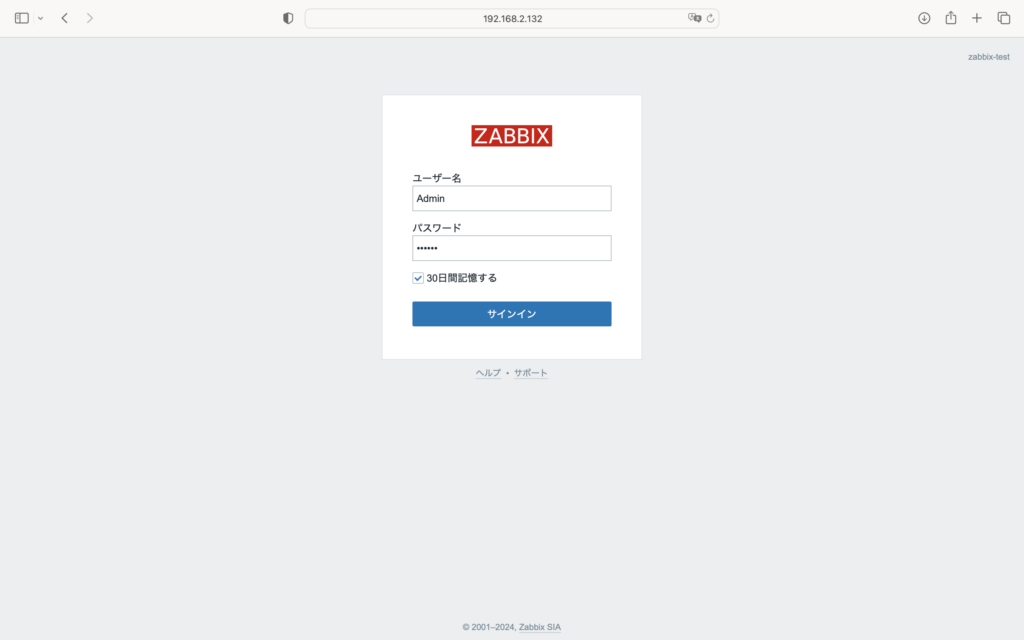
ログイン画面になりますので以下の初期ユーザー名と初期パスワードを入力します。
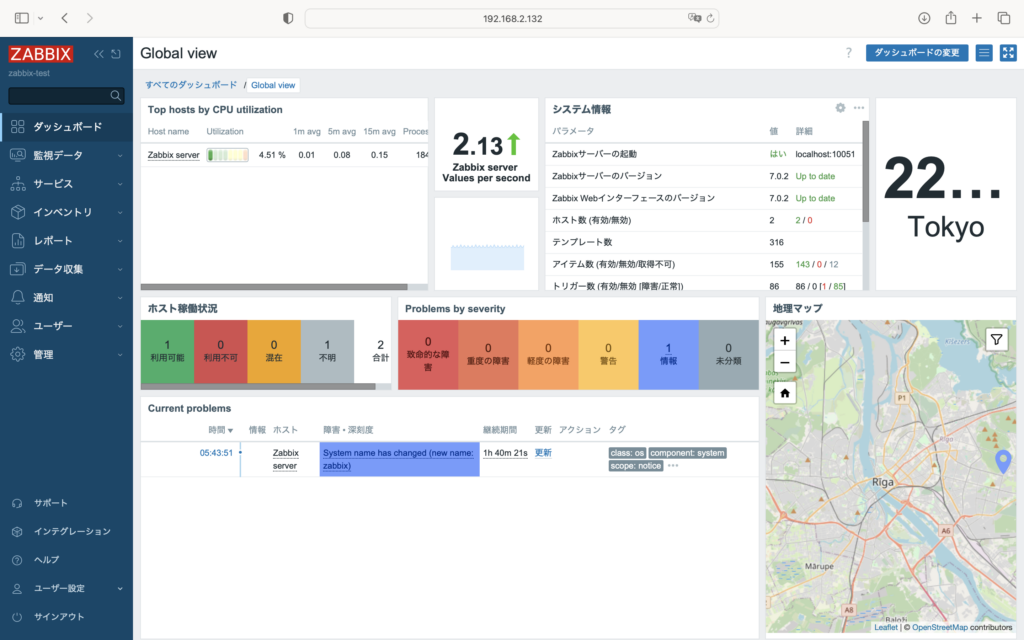
以下の画面が表示されたらインストール完了です。
補足 パッケージ説明
パッケージ説明
以下、必要なパッケージと各パッケージの説明になります。
zabbix-server-mysql
zabbix-web-mysql
zabbix-apache-conf
zabbix-sql-scripts
zabbix-selinux-policy
zabbix-agent
mysql-server
httpd
zabbix-web-japanese
zabbix-server-mysql
ZabbixサーバーのMySQLデータベースを使用するバージョンです。
zabbix-web-mysql
ZabbixのWebインターフェースであり、MySQLデータベースと連携して動作します。ユーザーはこのWebインターフェースを使用して、監視データの表示、管理、設定を行います。
zabbix-apache-conf
ZabbixのWebインターフェースをApacheウェブサーバーで動作させるための設定ファイルです。この設定ファイルを使って、ApacheサーバーがZabbixのWebインターフェースを正しく提供できるようにします。
zabbix-sql-scripts
Zabbixの初期設定やアップグレードの際に使用されるSQLスクリプトです。これらのスクリプトは、データベースのテーブルや初期データの作成、スキーマの更新などを行います。
zabbix-selinux-policy
SELinux(Security-Enhanced Linux)環境でZabbixを安全に実行するためのポリシー設定です。SELinuxは、Linuxカーネルのアクセス制御機能であり、zabbix-selinux-policyはZabbixが正しく機能するように必要な権限を設定します。
zabbix-agent
Zabbixエージェントは、監視対象のホストにインストールされるソフトウェアコンポーネントです。エージェントはホストのリソース(CPU、メモリ、ディスクなど)を監視し、Zabbixサーバーにデータを送信します。
mysql-server
MySQLデータベースサーバーは、データベース管理システムです。Zabbixサーバーは監視データを保存するためにMySQLデータベースを使用します。
httpd
Apache HTTPサーバーのことです。ZabbixのWebインターフェースを提供するために使用されます。
zabbix-web-japanese
ZabbixのWebインターフェースに日本語を追加するためのパッケージです。このパッケージをインストールすると、ZabbixのWebインターフェースを日本語で利用できるようになります。公式サイトの手順は英語なのでこの設定は記載されておりませので日本語で使用したい方は別途必要になります。

